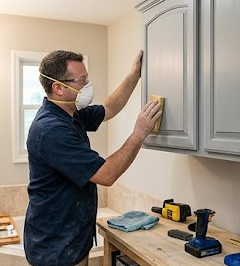
Cabinet Refinishing Modesto can dramatically improve the appearance of a kitchen, bathroom, laundry room, or other interior space without requiring complete cabinet replacement. While the process may seem straightforward, achieving a smooth and durable finish depends on careful preparation, appropriate materials, and proper application techniques. Small mistakes during cleaning, sanding, priming, or coating can lead to peeling, visible brush marks, uneven surfaces, and premature wear.
Some problems may not become noticeable until weeks or months after the project is finished. Understanding the most common cabinet refinishing mistakes to avoid can help homeowners achieve better results and protect the time and money invested in the project.
Why Is Poor Surface Preparation a Major Refinishing Mistake?
One of the most common cabinet refinishing mistakes is applying new products before the existing surfaces have been properly prepared. Cabinets accumulate grease, fingerprints, dust, cooking residue, cleaning products, and other contaminants over time. If these materials remain on the surface, primer and finish coats may struggle to adhere properly. Even cabinets that look clean can have an invisible layer of grease, particularly around handles and cooking areas. Thorough preparation creates the foundation for a durable finish.
Preparation also includes inspecting the cabinets for damage before refinishing begins. Cracks, dents, loose joints, peeling veneer, damaged edges, and old hardware holes should be addressed before applying new coatings. Simply covering these imperfections rarely makes them disappear and can sometimes make them more noticeable. A fresh finish tends to highlight irregularities when light reflects across the surface. Repairing problems first helps produce a cleaner and more professional appearance.
What Happens If You Skip Cleaning and Degreasing?
Skipping the cleaning process can cause some of the most frustrating cabinet refinishing failures. Kitchen cabinets are particularly vulnerable because cooking oils can become airborne and settle on surfaces throughout the room. Applying primer or paint directly over grease may result in poor adhesion, bubbling, separation, or peeling. Sanding before removing grease can also spread contaminants across the surface. Cleaning should therefore happen before the main sanding process begins.
Using the wrong cleaning method can create additional problems. Some household products leave behind residues that may interfere with subsequent coatings, while overly aggressive cleaners can affect certain cabinet materials or finishes. The cleaning product should be appropriate for the surface and the refinishing system being used. After cleaning, cabinets need adequate time to dry before sanding or coating begins. A clean, dry surface gives subsequent products a much better chance of performing correctly.
Can Incorrect Sanding Ruin Cabinet Refinishing?
Sanding is an important preparation step, but both insufficient and excessive sanding can cause problems. If glossy surfaces are not prepared adequately, the new coating may have difficulty forming a strong bond. On the other hand, aggressive sanding can damage thin veneers, decorative profiles, corners, and manufactured cabinet materials. The goal is to create an appropriate surface for the new finish rather than automatically stripping every cabinet down to bare material. Sanding methods should match the substrate and coating system.
Another frequent mistake is leaving sanding dust behind before applying primer or finish. Fine particles can settle into corners, profiles, joints, and flat surfaces where they become trapped beneath the coating. This creates roughness and prevents the smooth appearance many homeowners expect from refinished cabinets. Dust should be removed carefully after sanding, and the surrounding work area should also be cleaned. Surface preparation is not complete until the cabinet is both properly sanded and free of debris.
Why Does Choosing the Wrong Primer or Finish Cause Problems?
Not every paint, primer, or coating is appropriate for cabinetry. Cabinets experience frequent touching, cleaning, moisture, grease, and impacts, so the finish must withstand more demanding conditions than many ordinary painted surfaces. Selecting products without considering the existing cabinet material and finish can lead to poor adhesion or disappointing durability. Primer and topcoat compatibility is also important because not every product combination is designed to work together. Using a compatible refinishing system reduces unnecessary problems.
Skipping primer when the selected coating system requires it is another common mistake. An appropriate primer can improve adhesion, create a consistent base, and help prevent existing colors or stains from affecting the finished appearance. Certain woods may also contain tannins or other substances capable of bleeding through unsuitable coatings. The correct primer depends on the substrate and desired finish. Following manufacturer recommendations is generally safer than assuming one primer works for every cabinet.
Why Is Applying Coats Too Thickly a Problem?
Applying heavy coats may seem like a way to finish the project faster, but it often produces worse results. Thick layers can sag, run, remain soft, or dry unevenly, particularly around corners and decorative details. Heavy application may also create visible texture that becomes difficult to correct after curing. Multiple controlled coats generally produce a smoother appearance than trying to achieve complete coverage in one pass. Patience during application can significantly improve the finished surface.
Proper drying time between coats is equally important. Applying another layer before the previous one is ready can interfere with curing and create a finish that remains soft or vulnerable to damage. Temperature, humidity, ventilation, coating type, and application thickness can all influence drying and recoat times. Product instructions should guide the schedule rather than simply judging the surface by touch. A coating that feels dry may not yet be ready for additional layers or normal use.
What Problems Can Poor Application Technique Cause?
Application technique has a major influence on the appearance of refinished cabinets. Inconsistent brush strokes, overloaded rollers, uneven spraying, and repeated passes over partially drying material can leave visible marks or texture. Cabinet doors have large flat surfaces where these imperfections are particularly noticeable under overhead lighting. Maintaining a consistent application method helps create a more uniform finish. Proper tools should also be selected according to the coating and desired result.
Edges and detailed profiles require additional attention because excess coating can collect in corners and recessed areas. These accumulations may create drips, ridges, or uneven drying that becomes obvious after the finish cures. Working methodically makes it easier to maintain consistent coverage across doors, drawer fronts, and cabinet frames. Good lighting is also important because it reveals missed areas and surface defects during application. Careful technique helps reduce the amount of corrective work needed later.
Why Is Refinishing Cabinets Without Removing Hardware a Mistake?
Trying to refinish cabinets while hinges, knobs, and pulls remain installed can make the project more difficult. Coatings may collect around hardware edges, making the finished surface look uneven or poorly defined. Hardware can also become accidentally coated, particularly when spraying or working quickly. Removing these components provides better access to the cabinet surface and creates cleaner transitions. It also makes sanding and cleaning around hardware locations much easier.
Doors and drawer fronts should also be removed when the project and cabinet construction allow it. Working with them on a stable surface provides better control during cleaning, sanding, priming, and finishing. Each component should be labeled so it can return to its original location after refinishing. Hardware can be organized in labeled containers to prevent confusion or missing pieces. Good organization during disassembly saves considerable time during reinstallation.
What Happens If You Reassemble Cabinets Too Soon?
One of the easiest mistakes to make occurs near the end of the project when homeowners are eager to put the kitchen back together. A finish can feel dry to the touch while still needing additional time to cure and develop its intended durability. Reinstalling doors, hardware, and drawer fronts too soon may leave dents, impressions, scratches, or sticking points in the new surface. Normal household use can also damage coatings that have not fully cured. Drying and curing should not be treated as the same thing.
After reassembly, newly refinished cabinets should be handled carefully according to the coating manufacturer’s recommendations. Aggressive cleaning and heavy use may need to be avoided until the finish has reached sufficient hardness. Providing adequate curing time protects all the work completed during earlier stages. It can be frustrating to wait after the cabinets look finished, but patience reduces the risk of immediate damage. The final stage is just as important as preparation.
When Is Professional Cabinet Refinishing a Better Option?
DIY cabinet refinishing can be suitable for homeowners who have the necessary time, workspace, tools, and attention to detail. However, large kitchens, heavily damaged cabinets, complicated profiles, or difficult existing finishes can make the project considerably more challenging. Professional cabinet refinishers have experience with surface preparation, application techniques, coating systems, and controlled finishing procedures. This expertise can help produce consistent results across numerous doors and drawer fronts. Professional service may also reduce the disruption associated with a lengthy DIY project.
Professional evaluation can be particularly valuable when homeowners are unsure whether their cabinets are suitable for refinishing. Severe water damage, deteriorated engineered materials, peeling veneers, or structural problems may require repairs before cosmetic work begins. Refinishing cabinets that are fundamentally damaged can waste both time and materials. An experienced professional can help determine whether refinishing, refacing, repair, or replacement is the better approach. Making that decision before starting can prevent costly mistakes.
Final Thoughts
Avoiding common cabinet refinishing mistakes starts with recognizing that a durable finish depends on much more than simply applying a new coat of paint or stain. Inadequate cleaning, incorrect sanding, unsuitable products, heavy coats, poor application technique, rushed drying times, and premature reassembly can all affect the final result. Careful preparation and patience at every stage help produce cabinets that look smoother and withstand everyday use more effectively. Homeowners should also consider the condition and material of their existing cabinetry before choosing a refinishing method. By avoiding shortcuts and following a thoughtful process, cabinet refinishing can provide an attractive and long-lasting update without the expense and disruption of complete cabinet replacement.